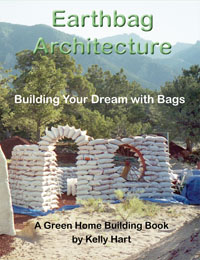
| An Earthbag Sauna by Canadian Dirtbags from facebook.com |
A couple of years ago, Shane and I fell in love with an acreage in the "middle of nowhere"- a small parcel of land on the Alberta prairies. We decided, pretty much on the spot, to trade our high-powered, fast paced careers and home in the city for a new way of life. It took some adjustment as we moved from a "wants"-based lifestyle to evaluating needs, and learning to prioritize and carefully plan our limited trips to the nearest town. No more running out to the store at 11 p.m. for those last minute items, or ordering pizza (or anything else!) for delivery! Even more surprisingly - no more fresh, potable water straight from the tap. So how about materials? Dirt. Plenty o'dirt. Got it. Bags to load the dirt in. Check. Barbed wire to Velcro the rows together. Found some rusty old stuff abandoned at the side of a road - check. Tampers for the endless tamping - made some. Roofing materials? Don't need any - it's a dome! Wood - only required for doorways and window frames. Plaster? More mud! Durability? The domes were originally tested to be suitable for lunar dwellings and can withstand fire, earthquakes, hurricanes and bullets. Far more than we have to deal with in an average day on the prairie. Ease of construction? If you have played with clay, chances are you can build a dome. Time commitment? Okay, a fair amount for two people but still within our two year goal. We're pretty sure. Our goal is to build a home for as little money as possible, and teach others to do the same. We're using the clay from our own property and "reject gravel" from a local gravel pit (~$1.80/cubic yard). The bags that we're using (6 mil poly tubing) is $120 for 500 feet but if you have access, you may be able to obtain feed bags for less money. We use a limited amount of wood, but what we have has come from pallets (free) and collected from dumps. It's amazing what people throw away. The straw that we will use in the cobbing of the exterior has been generously donated by a neighbour and the manure used in plaster is, of course, free.
We started by digging and leveling a 12' round pad and laying it with gravel (larger on bottom, smaller gravel on top). We lay the earthen floor right away though in retrospect we're not sure if we should have waited. It's holding up well and has withstood all sorts of extreme weather but we'll let you know later whether we should have put it in after laying the walls.
We then started on our gravel-clay mix. We stuck with a 70% gravel, 30% clay mix. I used empty ice-cream containers to measure my quantities.
Initially we mixed on a tarp but this is a lot of work and we decided to invest in a concrete mixer which has sped things up dramatically. (I LOVE the concrete mixer.) An important note: your clay must be well sifted before mixing or it will just clump up in the mix instead of coating your sand/gravel.
We've decided to go vertical for the first 5 or so rows and then we'll start corbelling at a maximum of 3" per row. We have drawn out the specs for our dome and hope to stick relatively close to our design but we're not too worried if we're off a bit. Like all of our new experiences, we'll find out afterwards if we should have been more careful. In my (humble, inexperienced) opinion, working with mud should be somewhat more flexible than traditional building so we're going to test that theory out and hopefully it holds water.
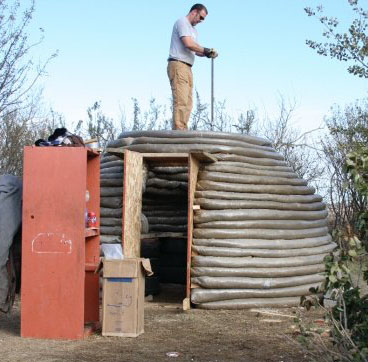
So far we've put in 4 solid days of work between the two of us, and a couple of evenings of "prep", and we're up to 9 rows. That's about 3500 kilograms of dirt. I'm tired. And bruised. And my hands are raw. And I'm covered in mosquito bites. (Shane's in worse shape than I am but he never complains so I try to make up for his share.) We're at 17 rows now, probably 6 or so short of completion. While the rows are decreasing in size, it is increasingly difficult to load the tubes given the height of the dome and the slick polypropylene. It's very cold right now. We're getting excited when the temperature rises to 5 C and the wind drops below 20 km/hr. Shane is back to work so I prepare our mixes during the day and we load the tubes in the evening. We don't have time to wait for weekends anymore.
We might have done well to plan further in advance. We'd have been waaaay better off having started this project earlier in the year. But as it sits, we're racing against time and the weather to finish our dome. I'd say before first snowfall but alas, it snowed earlier today.
We picked up some urbanite from a cement company that was glad to see it go and we'll use this around the base of the dome once we're ready to cob the exterior. That is, if we get the Indian summer we're hoping for because cobbing is not recommended in freezing temperatures. We may have to leave off finishing the exterior until spring if we don't get a break in weather.
We used a 60-40 mix (60% gravel-sand and 40% clay-earth) in the cob (+manure and straw) and 2-1-1 (sand to clay and manure) in the plaster. The plaster is holding well. The dome is currently covered in snow so it'll be interesting to see how it holds up once that melts away.
Not bad for a building made of mud and garbage. The only thing we purchased were the 6 mil plastic tubes - everything else was either from the ground or salvaged. We'll keep you posted on how it survives the Canadian winter! At -40 Celsius and lots of snow, it should be a good test of how these domes handle extreme weather. |


 The Loader-chute is shown at left. The tubing we used worked for us insofar as it held the material well and was easy to use. It doesn't breathe like the poly-weave kind though. We're trying to track down some used feed bags now to test the difference and will most likely use the woven bags for our house so that curing is not delayed.
  First row is easy - stuff your bag, hard-ass it (see "Earthbag Building") so that it's nice and solid at the end that will face your door form, lay it down and continue stuffing the coil. Since we're a team of two, I measure and mix and Shane has the manly job of lugging the extremely heavy containers of dirt and loading them into the tube. Once stuffed, we tamp until a hardness close to that of a sidewalk is obtained and voila - we're done with row one. Next we lay barbed wire along the top of the first row to 'velcro' in the next coil and we start the process over again.

 As the sleet stung my cheeks early yesterday morning, I thought to myself: Had anyone told me I'd be standing in the snow and through sleet to mix up sand and clay and cat shit to build a sauna- a prelude to a new home no less- I'd have said they were f**king nuts. (Note to self: remove cats from the worksite next year.) I share this with Shane and he kisses me on the head and asks "who's nuts now?"
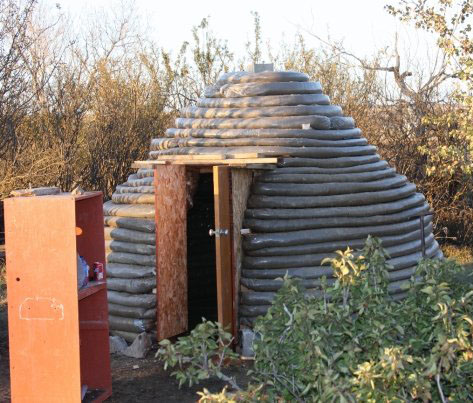

 Once the dome is up, we'll get started on the rocket stove and benches. The stove will provide enough heat to allow us to finish the inside of the dome even if we don't get to the outside this year. All complaints aside, we're making good progress. The rocket stove in place ...
Amazing how quickly this heats up, with very little wood for fuel and absolutely no smoke!
Once the dome is up, we'll get started on the rocket stove and benches. The stove will provide enough heat to allow us to finish the inside of the dome even if we don't get to the outside this year. All complaints aside, we're making good progress. The rocket stove in place ...
Amazing how quickly this heats up, with very little wood for fuel and absolutely no smoke!