| Texas Stonehenge by Clay DiMeno |
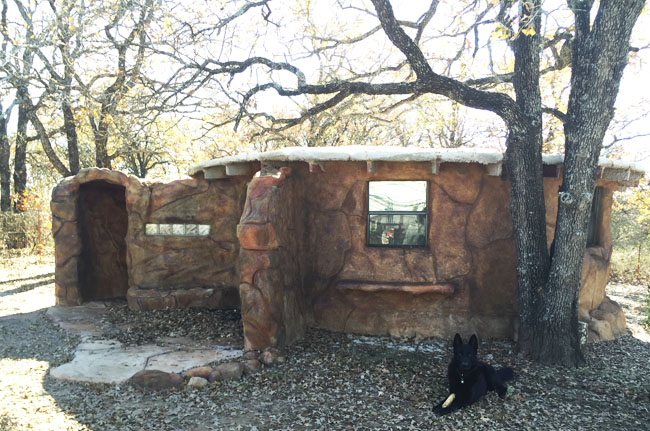
Texas Stonehenge is what Clay DiMeno calls this bunker/tornado shelter/man cave that he made with earthbags and a lot of creative ingenuity. The following is mostly a pictorial description, with occasional commentary, of how he made it.
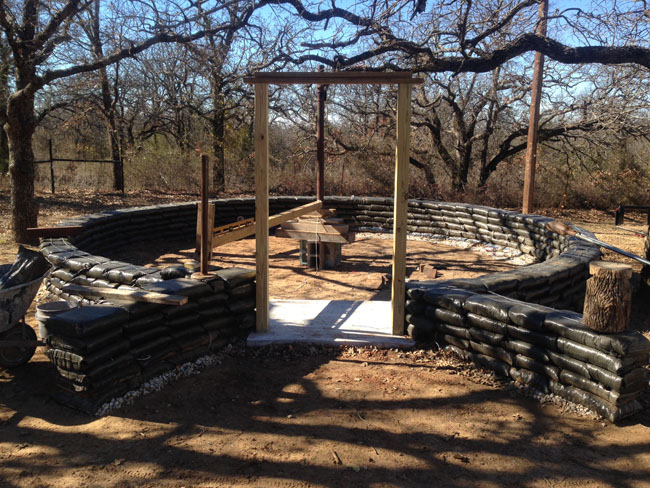
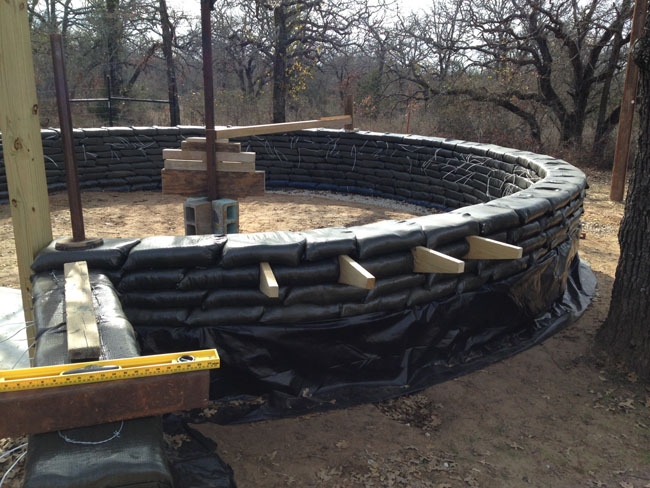
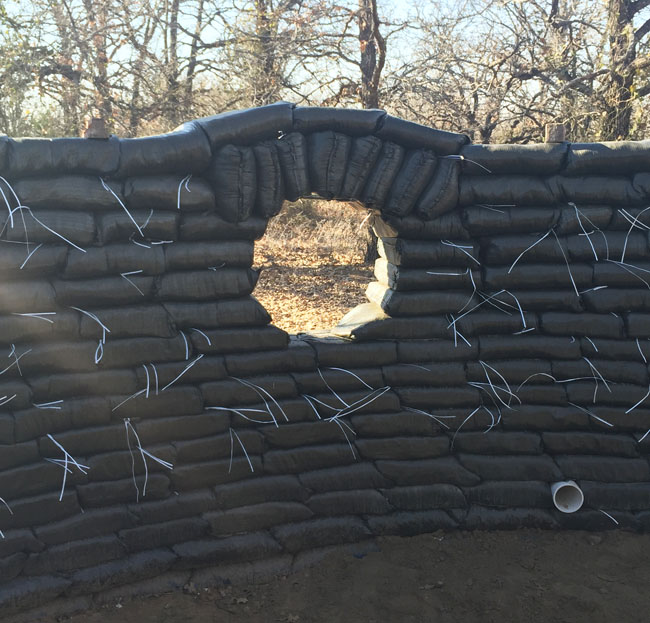
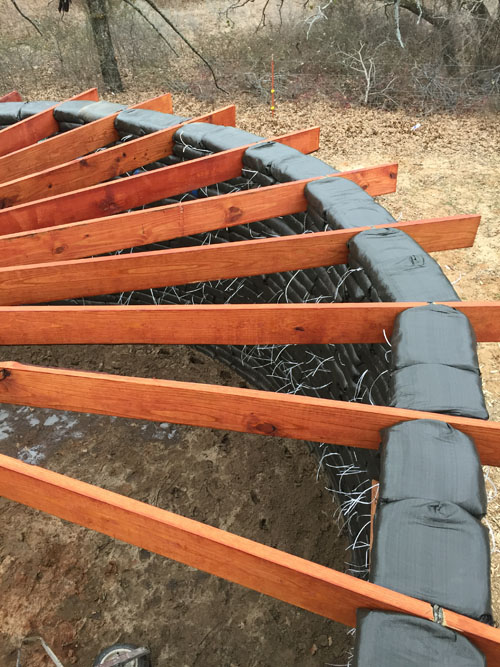
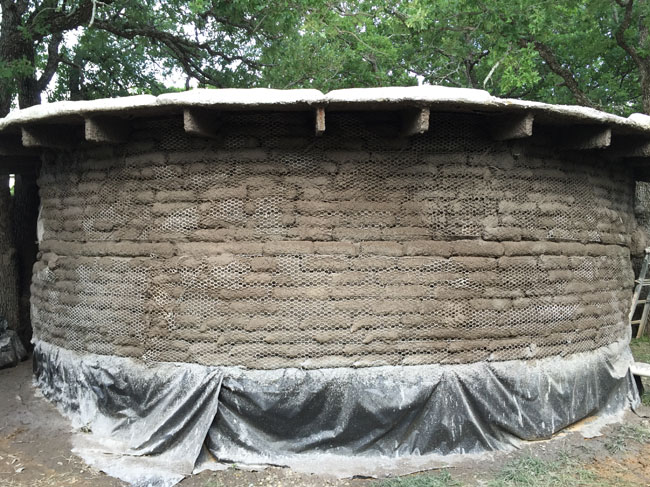
The arch window I made in the wall for fun while building was going up. It lets light in on the south side. There are 3 vent tubes 4" diameter at the top row earthbags evenly spaced around the top. One earth tube at floor level I tried just as an experiment. It will be buried on the outside and is about 10 foot long to pull air in. There is no humidity at all inside. Plenty of airflow. I have filled 1300 bags. I think a few hundred more and I should be done with walls and can start on the roof. I left bag ties hanging out as I will secure my wire lathe to the walls with them. Adding metal ties later is no fun. Inside will get concrete carved.
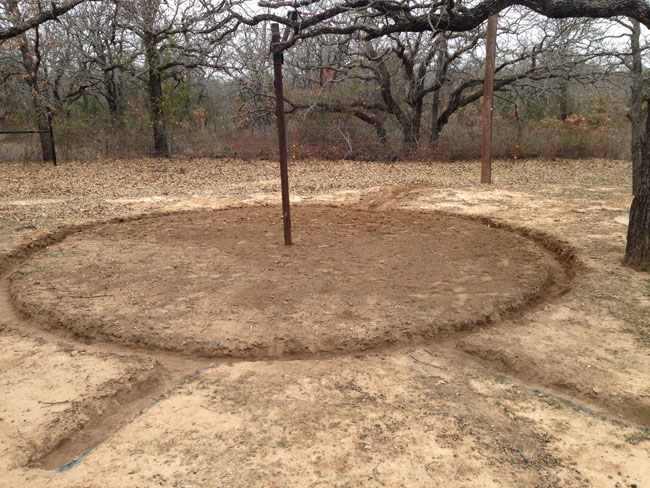
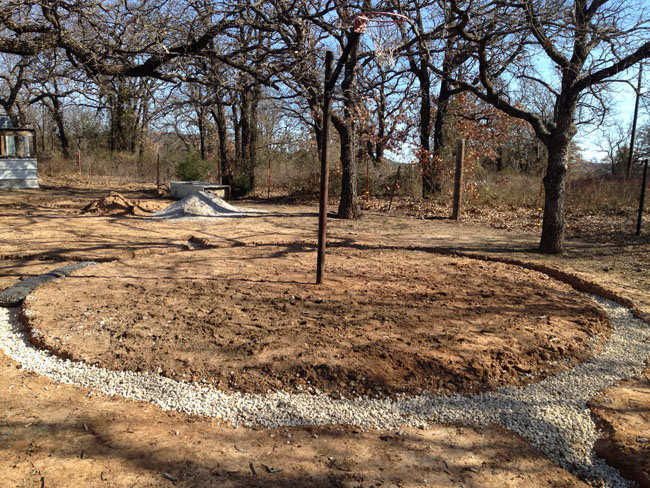
There are roughly 1600 bags in the entire building. Main building is 20' diameter circle (314 square feet) the walls are about 7.5 foot tall.
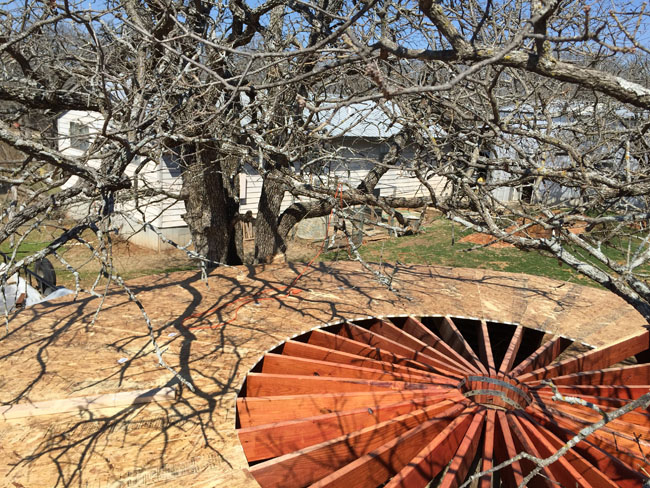
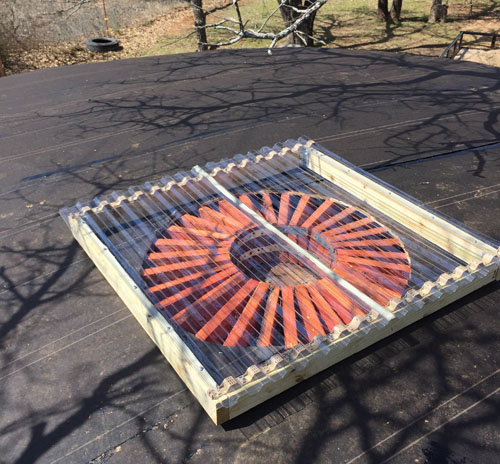
Skylight idea came out OK looking, and for $30 not bad for a 4 foot by 4 foot skylight!
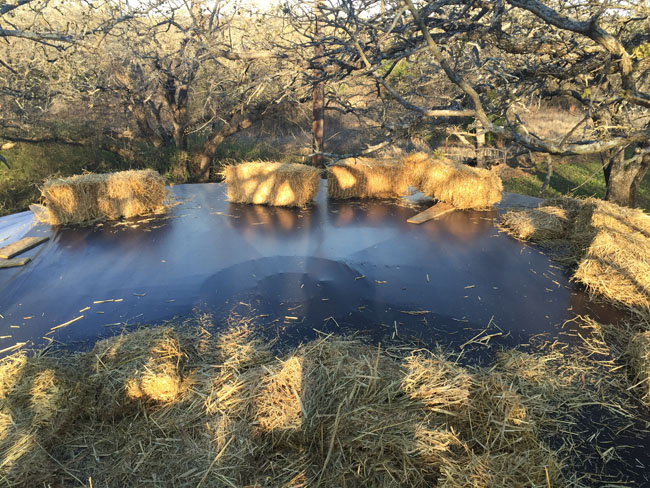
Decided to completely cover the roofs with 4 layers of tar paper and 6 mil plastic with 12 straw bales torn apart and spread out all over the roof for a good 8-12 inches of insulation.
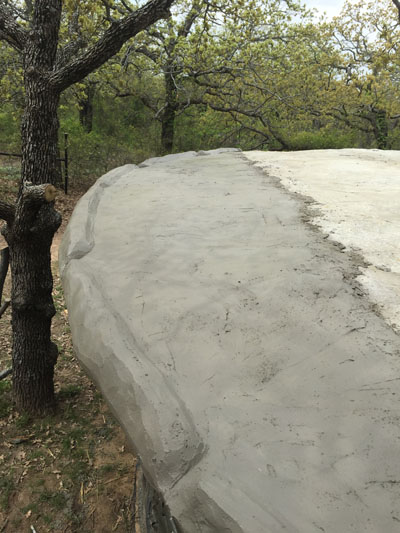
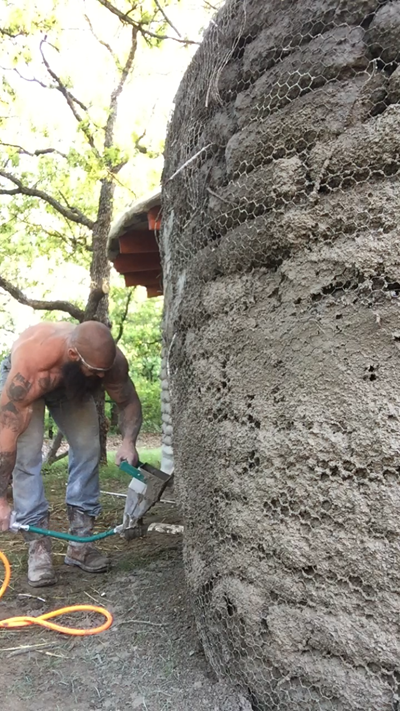
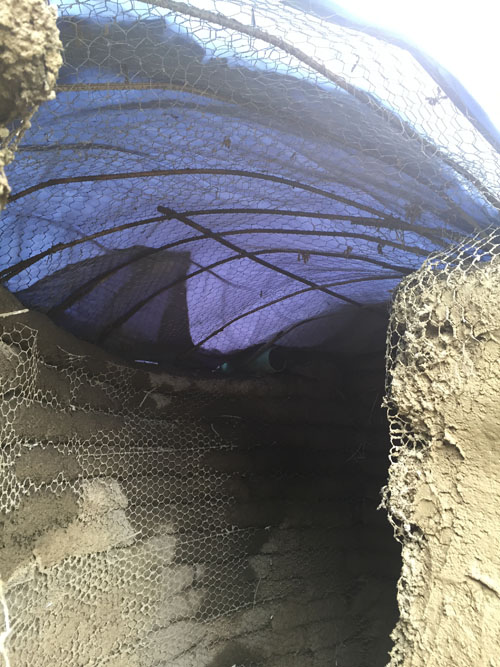
Waterproofed over top of the hay with 2 more layers of 4 mil plastic. I stretched chicken wire all over the top and covered in a 1 inch coat of cement. This gave it a hard shell that I feel will better support the dirt and tie the whole roof together, at the same time solving the problem of the sun eating away the exposed plastic at the eve edges. On top I will throw 6 inches of dirt and plant grass. Will see how it works out. Soil will come right to the edge. Lots to consider on living roof.
Then I had a good idea to make a 5 inch lip all the way around the edge of the roof with a 2 inch break in it about every 4 feet to let water run off. This will help hold the gravel up that will cover from the edge of the roof up about a foot and a half and let water drain from the soil and stop roots from growing too close to the edge. I didn't want roots to grow around under the eve and possibly penetrate the roof or grow into the sandbags. Came out really nice and is a final solution that I will never have to redo again in the future. Water is directed where I wanted it to shed off the roof (away from windows and door.) The concrete will get a sealer sprayed on it then covered with dirt/soil mix within a month.
First coat blown on roof and bags.
Chicken wire and 1 inch coat of concrete.
Old sheet over wire and rebar forms temporary for roof for shower to be covered with concrete.
Carve coat started.
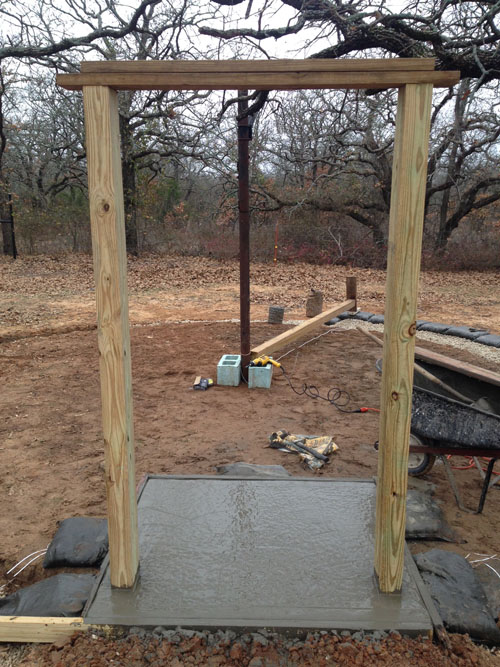
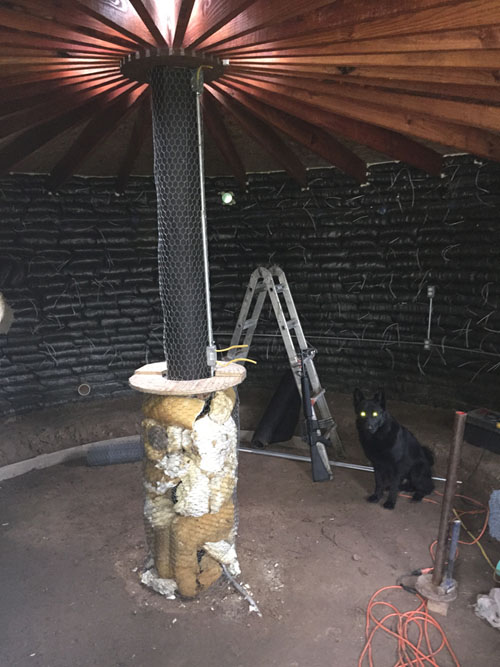
Telephone pole wrapped and wired. Foam inside to fill gaps.
Floor almost done. Scrap Steel everywhere to keep it from cracking. Poured about 3 inches thick all smoothed with a trowel, no fancy concrete equipment. Rolled with a texture roller before completely dry.
Bar formed up. Concreted 4x4's with plywood top wired up ready for first coat.
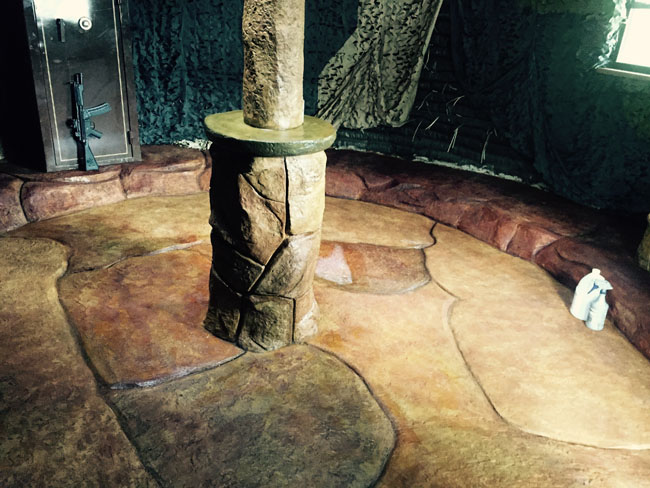
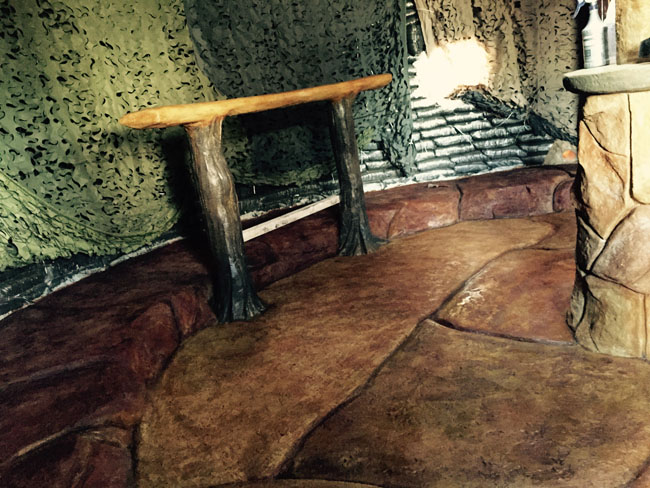
Carve coat finished. Was trying to make it look like tree trunks and a wood top.
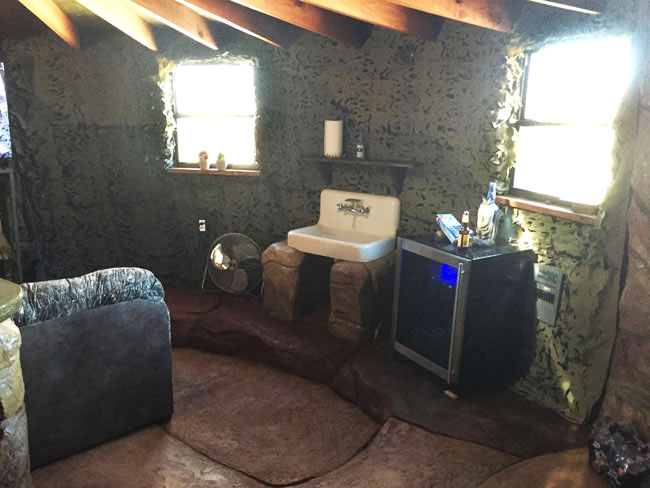
Sink base made out of more earth bags of course.
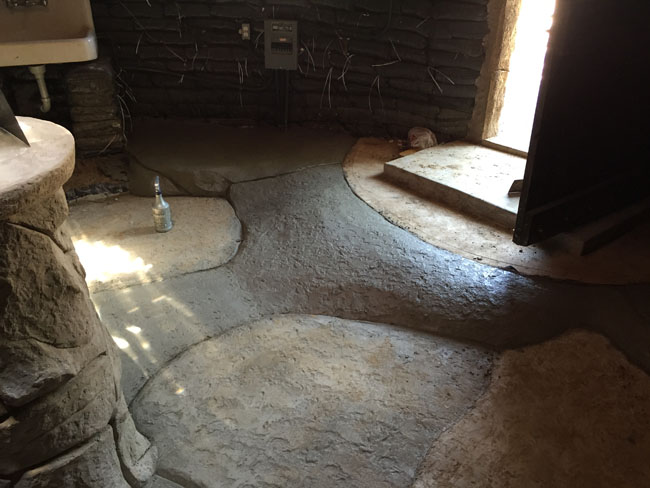
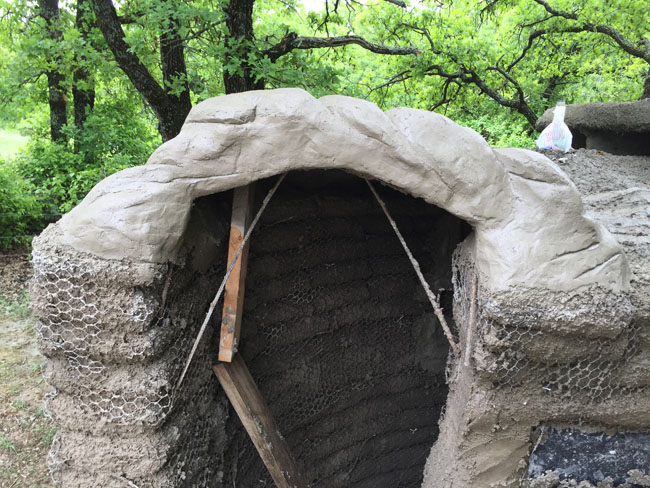
Looking in the outside shower. Bottle in the roof is old school like they do in Africa and places. Let's sunlight in and actually works pretty good.
Window work done with bench seat underneath.
I'm pretty much done with this project. It's such a cool bunker/tornado shelter/man cave! Next spring I will plant some kind of ivy or shrubs that climb. Goal is to have the roof and 3/4 of the back side of the building covered in nice green foliage.
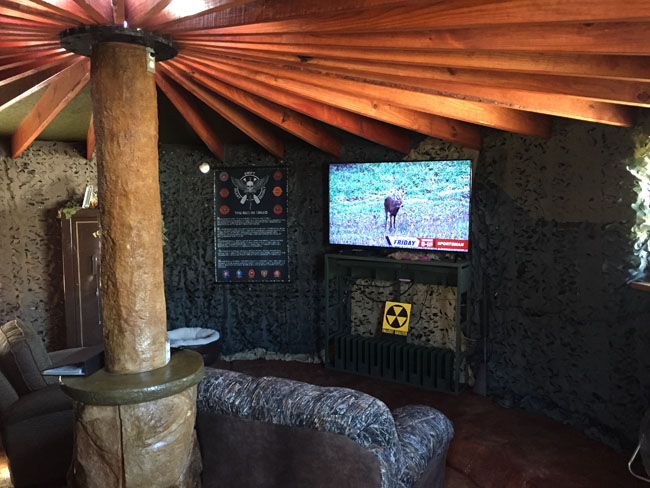
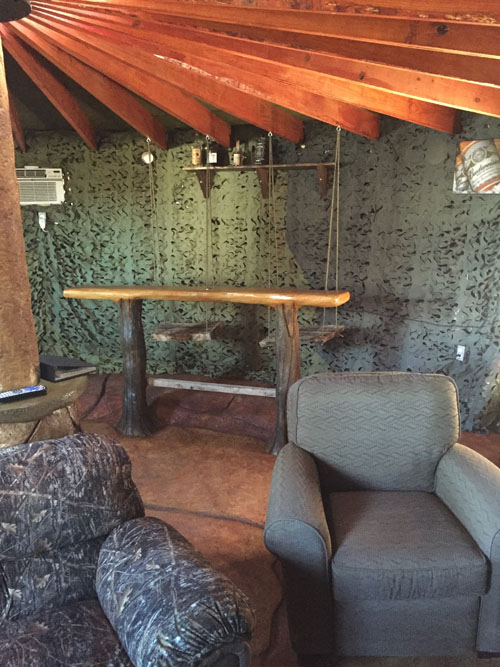
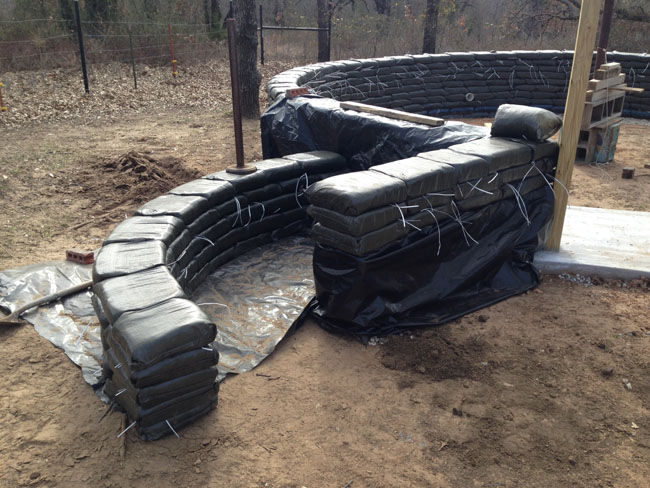
Camouflage netting on the walls with bags behind worked really good and gives the military bunker appearance I was wanting.
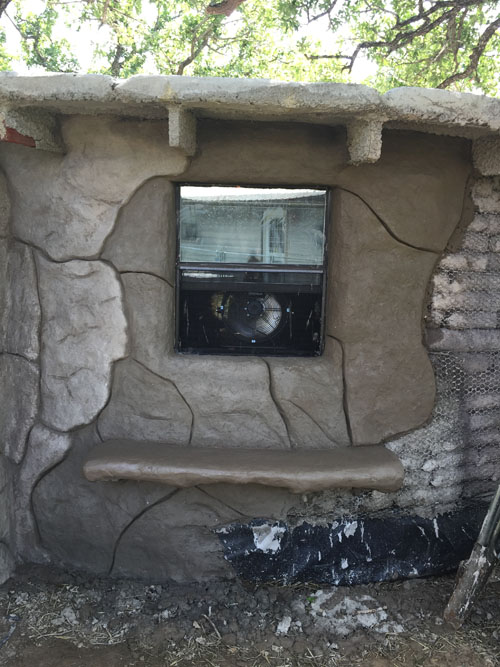
My little concrete bar seats 2 with some homemade oak hanging chairs. Seems to bring the kid out in folks. A/C unit can be seen on the left for really hot Texas Summer's though I never turned it on inside yet. Seems to stay 15 degrees cooler than outside.
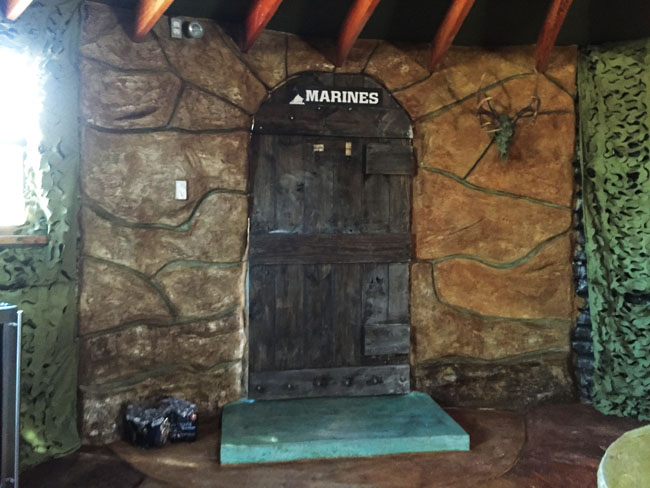
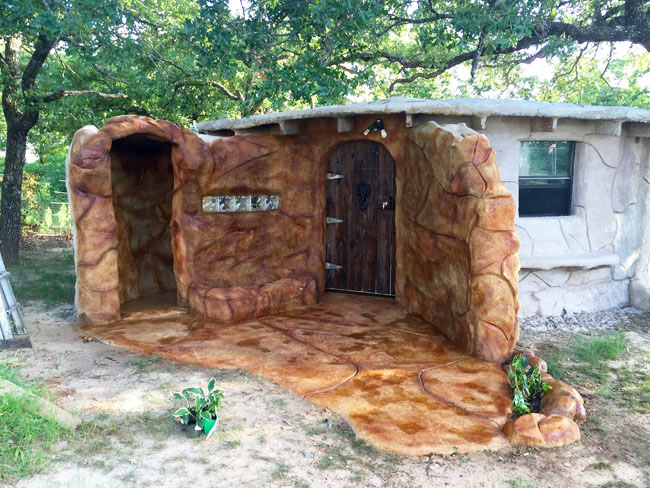
I did concrete and carved 5 foot on each side or the front door just to break up the netting a little. Tried a stain on the door step called Azure sky, came out a turquoise blue and is neat because it's different than the rest of the the stain. Stained, spike handle and locking latch made. Swing open peep window made like old time doors.
Between the two windows is a 1940's cast iron/porcelain sink I dug out of a junk pile. Made my own fittings and works like a charm. Of course a cold beer fridge to the right of the sink is a must! Hahah
Took me by myself working mostly on weekends roughly 5 months to build. I did have some down time as we had a few months of solid rain. Good thing is, it was a perfect test and it never had a leak! I have to give my wife Christina credit as she did enjoy the exercise and helped fill a few hundred bags. It's been a fun project. Time to relax and deer hunt now and decide what I'm gonna start building next. I've already been thinking about a small earthbag or earthship swimming pool. Lots of cool ideas. |


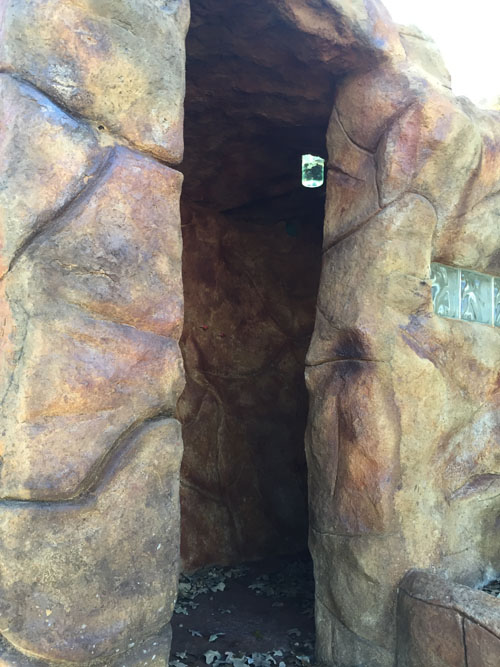
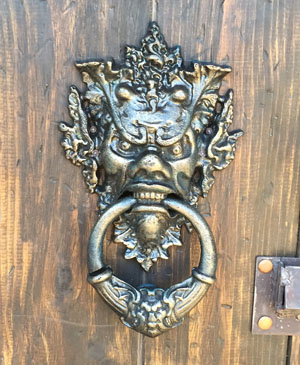 First stain. Looking at outdoor shower entrance to the left of the front door. Glass blocks to let a little light in. The finished door I built from 2x8's and steel. I just like the old time look it gave, and the door knocker is the only thing I bought; at $60 it was the most expensive piece on the door but I had to have it.