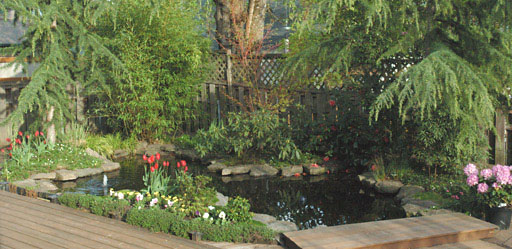
Welcome to my swimming pool to pond construction web page. I thought I would share with you a project I undertook converting a swimming pool to a pond. I moved into a house with an swimming pool near Portland, Oregon. I was always fond of ponds, and in fact, had built my first fish pond at my previous house. I always wanted a larger pond and here was my chance.
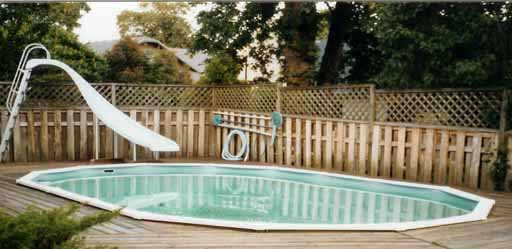
I started with this 24' x 16' x 7' deep Doughboy pool. The swimming pool had a plastic liner. I cut out just the bottom portion of the pool liner and revealed the dirt bottom. Nervous that years of chlorine might be in the side liner which was to become the side of a flower bed, I covered the side with sheets of plastic.
 The pond took me about five months of pacing myself to complete. I worked about an hour every few days, along with maybe an extra effort every couple of weekends. My goal was to fill the pond and get the flower beds planted in January. This allowed me to get pretty winter plants (so the pond would look nice in the winter). It also allowed the water to acclimate before things warmed up in spring and summer. The pond took me about five months of pacing myself to complete. I worked about an hour every few days, along with maybe an extra effort every couple of weekends. My goal was to fill the pond and get the flower beds planted in January. This allowed me to get pretty winter plants (so the pond would look nice in the winter). It also allowed the water to acclimate before things warmed up in spring and summer.
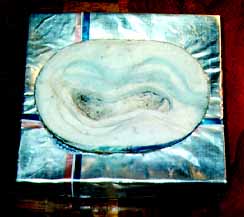
I made a clay model to scale (left), 1/4? = 1'. This allowed me to visualize the contours and shape of the pond. It helped me see where I would fill in dirt and sandbags to make multiple levels of steps within the pond.
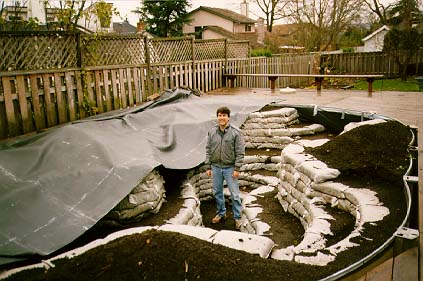
I used four truck loads of dirt, 400 sandbags, and countless hours of wheel barreling to fill in the swimming pool. Sandbags were used to help build multiple levels of pond depth. As I approached the height I wanted, I took my time and made sure I was making a perfectly level sandbag top edge. In the picture above the outer ring of sandbags is the edge of the pond (to be covered with rock). The dirt remaining to the edge of the swimming pool will become flower beds.
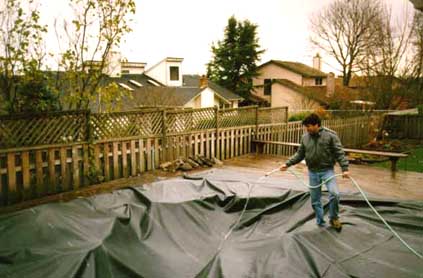
I used a 30' x 34' piece of EPDM pond liner. I'm starting to pull it over the pond in this picture.
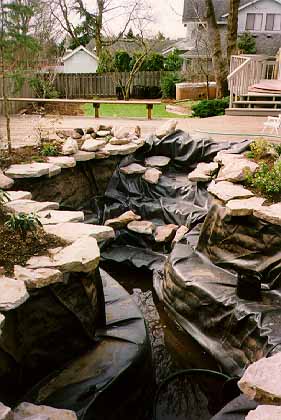
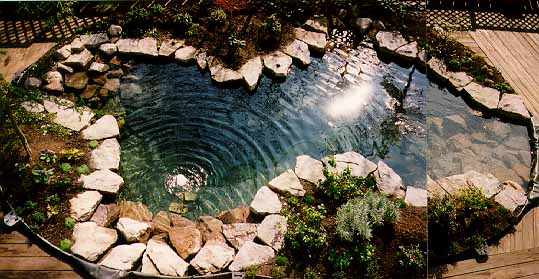
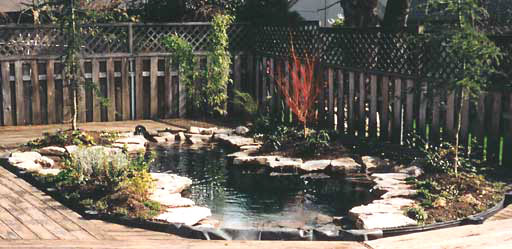
After filling the pond I used about 3 tons of Camas Gray 4? A-cut rock and round 35-75 lb boulders to build the edging. I did this while the pond was filled so I could see how things were looking. When I was done placing the rock, I drained and rinsed the pond. This picture is after draining. You can see I've already started planting plants around the edge.
I was very concerned about having such a huge amount of water go bad on me that I planned on a pond filter. I didn't want a huge ugly algae mess. I spent considerable time researching filters. On my previous home's pond, a smaller typical yard pond, I built it like an aquarium - with an underground gravel filter with PVC pipe running through it. It worked fantastic and I had perfectly clear water for years. But someone warned me it will be hard to clean. So this time I used the same principle (since it worked so well the first time) but I built it external to the pond. In addition I had now learned about the vegi-filter concept which incorporated plants.
|